
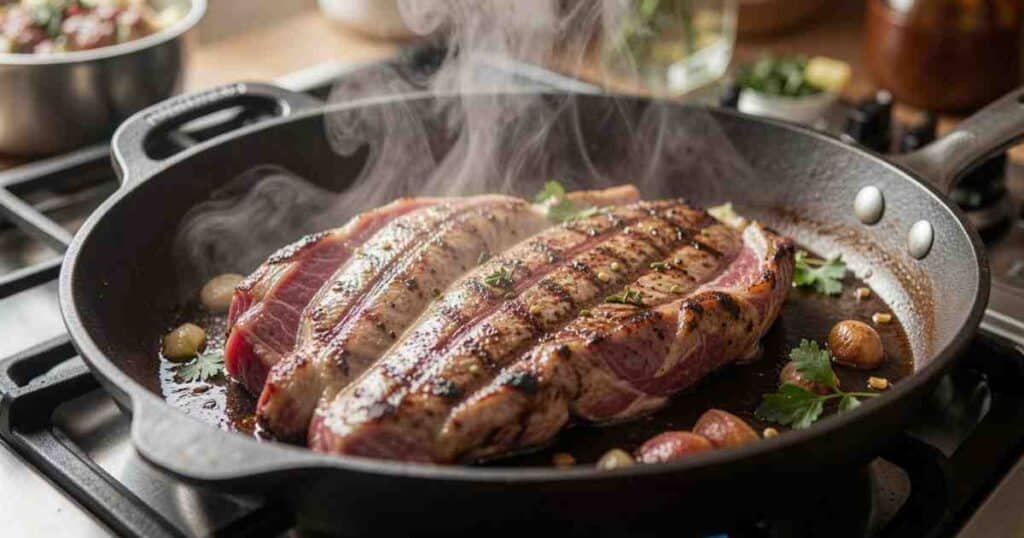
The Pre-Heat Test: How To Know Your Pan Is Actually Ready
The pre-heat test tells you whether your pan is hot enough before adding food or fat. For stainless steel, flick in a few drops of water: they should bead and dance, not vanish instantly.
For cast iron, preheat gradually over medium heat until evenly hot. Non-stick should be warmed gently, never overheated empty.
You’ve carefully prepped your ingredients, the recipe is in front of you, and you’re ready to start cooking. But then comes the dreaded question: is the pan hot enough? Too cold, and your food sticks and steams.
Too hot, and it burns before it cooks. Mastering The Pre-Heat Test: How To Know Your Pan Is Actually Ready is a simple skill that transforms cooking from frustrating guesswork to confident execution. This guide will show you how to get it right every time, ensuring better results and a more enjoyable cooking experience.
Key Takeaways
- Understand why preheating your pan is crucial for successful cooking.
- Learn simple, effective tests to confirm your pan is at the right temperature.
- Discover how different pan materials affect preheating times and methods.
- Prevent common cooking problems like sticking and uneven browning.
- Achieve restaurant-quality searing and cooking results at home.
![The Pre Heat Test How To Know Your Pan Is Actually Ready[1]](https://kitchentipsdaily.com/wp-content/uploads/2026/06/The_Pre-Heat_Test__How_To_Know_Your_Pan_Is_Actually_Ready1-1.jpg)
Why Pan Preheating Matters for Perfect Cooking
Cooking is a science, and temperature control is key. Preheating your pan is not just a suggestion; it’s a fundamental step. When a pan is properly heated, its surface expands slightly.
This expansion helps create a smoother surface, reducing the chances of food sticking. Think of it like preparing a canvas before painting. A well-prepared surface leads to a much better final product.
When you place food into a cold or insufficiently heated pan, the food’s proteins immediately begin to bond with the pan’s surface. This is the primary cause of sticking. The food essentially sears onto the metal.
A hot pan, on the other hand, creates a barrier. It rapidly cooks the outside of the food, forming a crust that releases easily. This process is vital for achieving that desirable golden-brown sear on meats, vegetables, and even delicate items like fish.
Beyond preventing sticking, preheating ensures even cooking. A uniformly hot pan distributes heat across its surface. This means your food cooks consistently, avoiding hot spots that can lead to burnt edges and undercooked centers.
It allows ingredients to cook at their intended rate, delivering optimal texture and flavor. Mastering The Pre-Heat Test: How To Know Your Pan Is Actually Ready is a direct path to better meals.
The Water Drop Test: A Classic Indicator
One of the most common and effective methods to check if your pan is ready is the water drop test. This is a simple yet highly reliable way to gauge the pan’s temperature. It works by observing how water behaves when it hits a hot surface.
First, ensure your pan is clean and dry. Any residual water from washing can interfere with the test. Place the pan over your burner and turn the heat to your desired setting.
For most pans, medium-high heat is a good starting point. Give the pan a minute or two to heat up. You should be able to feel the heat radiating from it, but don’t rely on touch alone.
Next, carefully take a small amount of water, about a teaspoon, and let it drop into the center of the pan. The way the water reacts tells you everything you need to know. If the water beads up and skitters across the surface, like tiny mercury balls, the pan is hot enough.
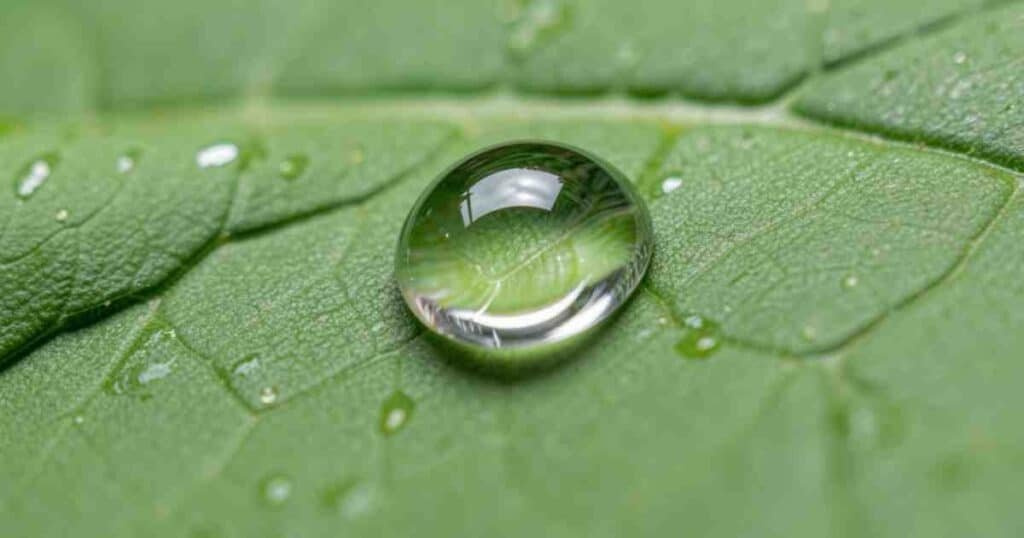
This indicates the pan has reached a temperature where the water instantly vaporizes on contact, creating a cushion of steam that allows the droplets to dance. This is the ideal state for cooking.
If the water immediately sizzles and disappears in wisps of steam, the pan is likely too hot. This means the water boiled away too quickly, and the pan might be scorching hot, risking burning your food. Conversely, if the water spreads out into a thin, dull film and then evaporates slowly, the pan is not yet hot enough.
It needs more time on the heat.
The water drop test is an excellent part of The Pre-Heat Test: How To Know Your Pan Is Actually Ready because it’s visual and immediate. It gives you a clear signal to proceed with adding your ingredients.
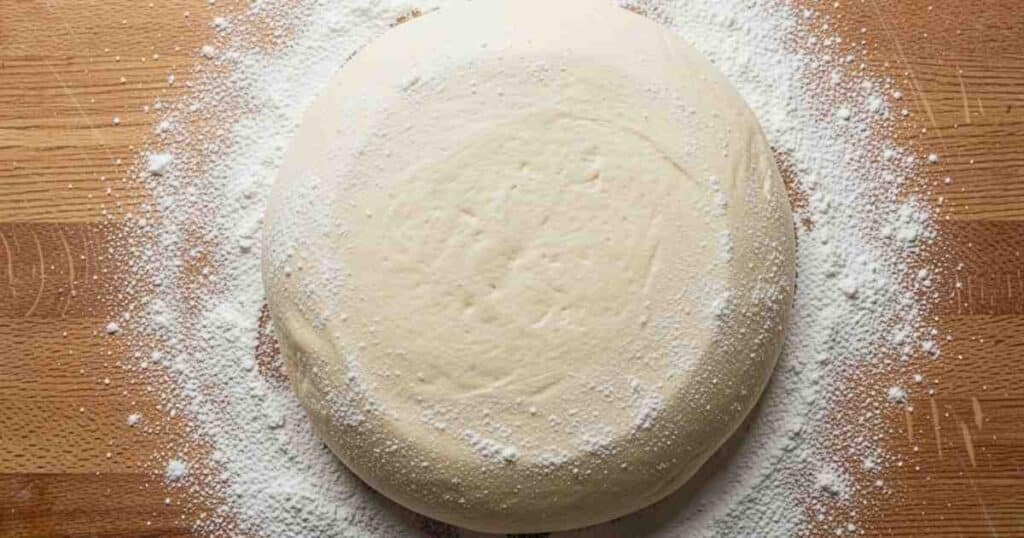
The Flour Test: For Delicate Ingredients
While the water drop test is fantastic for most situations, it’s not ideal for very delicate items like eggs or fish. For these, a different approach is needed. The flour test is a gentler way to check pan readiness, especially when you want to avoid any harsh sizzling that might shock delicate foods.
To perform the flour test, heat your pan over medium heat. Again, ensure it’s clean and dry. Once you feel warmth radiating from the pan, sprinkle a tiny pinch of flour into the center.
Watch how the flour behaves.
If the flour immediately sizzles and turns golden brown within seconds, your pan is ready. This indicates the pan is hot enough to cook the flour quickly, which is a good sign for delicate foods. It’s hot but not excessively so.
If the flour just sits there, or slowly starts to dry out without browning, the pan is not hot enough. You need to give it more time on the heat.
If the flour burns instantly and turns black, the pan is too hot. You’ll need to reduce the heat and let it cool slightly before testing again. This test is a crucial component of The Pre-Heat Test: How To Know Your Pan Is Actually Ready for recipes where precise temperature control is paramount.
Material Matters: Adapting to Your Cookware
The material of your pan significantly impacts how it heats up and how you should test its readiness. Different metals have different heat conductivity and retention properties. Understanding these differences helps you apply The Pre-Heat Test: How To Know Your Pan Is Actually Ready effectively for any cookware.
Cast Iron Pans
Cast iron is known for its excellent heat retention. It takes longer to heat up than other materials, but once hot, it stays hot. For cast iron, preheating is especially important to ensure a non-stick surface.
Use medium heat and allow ample time, perhaps 5-7 minutes. The water drop test works well here; you’re looking for those dancing beads.
Stainless Steel Pans
Stainless steel heats up relatively quickly but can develop hot spots if not preheated properly. It's also prone to sticking if not used correctly. The water drop test is your best friend with stainless steel.
Aim for the shimmering, dancing droplets. If you see a single drop evaporate instantly, it’s too hot. If it just sits there, it’s not hot enough.
Non-Stick Pans
Non-stick pans require a gentler approach. High heat can damage the non-stick coating over time. For non-stick pans, medium heat is usually sufficient.
You might not need a dramatic water drop test. Often, a quick wave of your hand over the pan will feel the heat. You can also use the flour test, looking for a gentle sizzle rather than immediate browning.
Never use metal utensils or harsh scrubbers on non-stick surfaces.
Copper Pans
Copper is an excellent conductor of heat, meaning it heats up very quickly and evenly. This makes it responsive to temperature changes. Be cautious with copper; it can go from perfectly heated to too hot in a matter of seconds.
Use medium-high heat and the water drop test. Watch carefully; the droplets should dance, but don’t let them evaporate too fast.
Knowing your pan’s material is a vital part of The Pre-Heat Test: How To Know Your Pan Is Actually Ready. It helps you adjust your heating time and method for optimal results.
The Hand-Wave Test: A Quick, Gentle Check
For a quick, non-invasive check, especially with non-stick or lighter pans, the hand-wave test can be useful. This method relies on sensing the heat radiating from the pan without direct contact.
First, hold your hand about 4-6 inches above the surface of the pan. Do not touch the pan. Turn the heat to medium or medium-high, depending on your pan type.
Let it heat for a minute or two.
Next, carefully bring your hand closer to the pan, but still not touching it. You should feel warmth radiating upwards. If you feel a gentle warmth, the pan is likely still too cool.
If you feel a distinct, comfortable heat that makes you want to pull your hand away slightly, the pan is probably getting close to the right temperature. If the heat feels intense and uncomfortable very quickly, the pan is likely too hot.
This test is more subjective than the water or flour tests. It’s best used as a preliminary check or for very sensitive cookware where you want to avoid any direct introduction of liquid or flour. It complements The Pre-Heat Test: How To Know Your Pan Is Actually Ready by offering another sensory cue.
Common Pitfalls and How to Avoid Them
Even with the right tests, some common mistakes can sabotage your preheating efforts. Being aware of these pitfalls helps you refine your technique and ensure consistent success.
Pitfall 1: Not enough heating time. This is perhaps the most frequent error. People rush the process, assuming the pan is hot because it looks like it is. Give your pan adequate time to reach temperature.
This can range from 2-3 minutes for thin-bottomed pans to 5-7 minutes for heavier ones like cast iron.
Pitfall 2: Using the wrong heat setting. Starting with excessively high heat can quickly lead to a pan that's too hot, burning your food before it cooks through. Conversely, starting too low means the pan will never reach the optimal temperature, leading to sticking and steaming. Use medium or medium-high heat and adjust as needed.
Pitfall 3: Adding oil too early. For many cooking methods, especially searing, you should preheat the pan first, then add the oil. Adding oil to a cold pan and then heating them together can lead to uneven heating of the oil and potential smoking or burning. Let the pan get hot, then add your oil.
Wait a moment for the oil to shimmer before adding your food.
Pitfall 4: Overcrowding the pan. Even with a perfectly preheated pan, adding too much food at once will lower the pan’s temperature drastically. This causes food to steam rather than sear. Cook in batches if necessary to maintain the pan’s heat and achieve that beautiful crust.
Pitfall 5: Ignoring the material. As discussed, different pan materials require different preheating strategies. A thin aluminum pan heats up much faster than a thick, enameled cast iron Dutch oven. Always consider your cookware.
Avoiding these common issues is part of mastering The Pre-Heat Test: How To Know Your Pan Is Actually Ready. It’s about understanding the nuances of heat and your cookware.
When to Pre-Heat: Every Time Matters
Is preheating necessary for every single dish? For most stovetop cooking, the answer is a resounding yes. Whether you’re sautéing vegetables, searing a steak, frying an egg, or making a quick sauce, a properly preheated pan makes a significant difference.
Consider these scenarios:
- Searing Meats: Absolutely essential. A hot pan creates the Maillard reaction, giving meat that delicious brown crust and rich flavor.
- Sautéing Vegetables: Preheating ensures vegetables cook quickly and evenly, retaining their crispness and vibrant color.
- Frying Eggs: A preheated pan prevents sticking and allows the egg white to set quickly without becoming rubbery.
- Making Pan Sauces: A hot pan deglazes better, releasing browned bits from the bottom that add depth to your sauce.
- Cooking Fish: Crucial for achieving a crispy skin and preventing the delicate flesh from breaking apart.
There are very few exceptions. For instance, when making a stew in a Dutch oven or a slow-cooked dish, you might start with a cold pan to build flavors gradually. However, for direct, high-heat cooking, preheating is non-negotiable.
It’s a fundamental technique that elevates your cooking.
Understanding when and why to pre-heat is the final piece of the puzzle for The Pre-Heat Test: How To Know Your Pan Is Actually Ready. It’s about consistency and achieving the best possible outcome for your meal.
Comparing Preheating Methods
Different tests offer different benefits. Knowing which test to use when can optimize your cooking process.
| Water Drop Test | Most pans, general cooking | Clear visual cue, effective for most materials | Can be too aggressive for very delicate foods |
| Flour Test | Delicate foods (eggs, fish), non-stick pans | Gentle, prevents shocking food, good indicator for non-stick | Adds a tiny amount of flour to the pan, requires observation |
| Hand-Wave Test | Quick check, non-stick, sensitive pans | Non-contact, fast, good for initial assessment | Subjective, less precise than water/flour tests |
Using a combination of these methods can be very effective. For instance, you might start with a hand-wave test, then proceed to the water drop test for a definitive answer. This layered approach ensures you’re always confident about your pan’s temperature.
Mastering The Pre-Heat Test: How To Know Your Pan Is Actually Ready means having multiple reliable tools at your disposal.
Frequently Asked Questions Of The Pre-Heat Test: How To Know Your Pan Is Actually Ready
Question: What is the best way to know if my pan is actually ready without a thermometer?
Answer: The most reliable methods involve the water drop test (droplets should dance) or the flour test (a pinch should sizzle and lightly brown). These visual cues tell you the pan has reached the correct temperature.
Question: How long should I pre-heat my pan?
Answer: This varies by pan material and thickness. Thin pans might take 2-3 minutes, while heavier ones like cast iron can take 5-7 minutes on medium heat. Always test with water or flour.
Question: Can I pre-heat my non-stick pan?
Answer: Yes, but use medium heat and avoid overheating. The flour test is often best for non-stick pans to ensure they are warm enough without getting too hot, which can damage the coating.
Question: What happens if I put food in a cold pan?
Answer: Food will likely stick, cook unevenly, and steam instead of searing. Proteins in the food will bond to the pan’s surface, making it difficult to release and resulting in a less appealing texture and color.
Question: Does The Pre-Heat Test: How To Know Your Pan Is Actually Ready apply to all types of pans?
Answer: Yes, the principles apply to all stovetop pans, including cast iron, stainless steel, copper, and non-stick. However, the heating time and specific test might be adjusted based on the material.
Question: Should I add oil before or after preheating the pan?
Answer: For most searing and sautéing, preheat the pan first, then add the oil. Let the oil heat for a moment until it shimmers before adding your ingredients. This prevents the oil from burning and ensures even cooking.
Final Thoughts
Consistently nailing The Pre-Heat Test: How To Know Your Pan Is Actually Ready transforms your cooking. By using simple tests like the water drop or flour methods, you prevent sticking, ensure even cooking, and achieve delicious results every time. Trust these techniques to guide you to perfect pan temperatures.

![Why The Pressure Cooker Nearly Disappeared After World War Ii[1]](https://kitchentipsdaily.com/wp-content/uploads/2026/06/Why_The_Pressure_Cooker_Nearly_Disappeared_After_World_War_Ii1-768x403.jpg)
![7 Things To Check On A Second Hand Cast Iron Pan Before Buying[1]](https://kitchentipsdaily.com/wp-content/uploads/2026/06/7_Things_To_Check_On_A_Second-Hand_Cast_Iron_Pan_Before_Buying1-768x403.jpg)
![Slow Cookers Tenderise Via Low Heat’ The Collagen Curve Reversal[1]](https://kitchentipsdaily.com/wp-content/uploads/2026/06/Slow_Cookers_Tenderise_Via_Low_Heat_The_Collagen_Curve_Reversal1-768x403.jpg)
![The Forgotten ‘Fireless Cooker’ Of 1910 Insulated Box Cooking Before Slow Cookers[1]](https://kitchentipsdaily.com/wp-content/uploads/2026/06/The_Forgotten_‘Fireless_Cooker_Of_1910__Insulated_Box_Cooking_Before_Slow_Cookers1-768x403.jpg)
![Why Altitude Ruins Your Pressure Cooker Recipes And The Correction Formula[1]](https://kitchentipsdaily.com/wp-content/uploads/2026/06/Why_Altitude_Ruins_Your_Pressure_Cooker_Recipes_And_The_Correction_Formula1-768x403.jpg)
![Modern Dish Soap Won’T Destroy Cast Iron Seasoning Modern Dish Soap Won’T Destroy Cast Iron Seasoning[1]](https://kitchentipsdaily.com/wp-content/uploads/2026/06/Modern_Dish_Soap_WonT_Destroy_Cast_Iron_Seasoning__Modern_Dish_Soap_WonT_Destroy_Cast_Iron_Seasoning1-768x403.jpg)